Learning-eBPF의 pdf에 기인한 내용(chapter3)이며 개인적으로 공부하며 작성되었기에 틀린 내용이 있다면 말씀해주시면 감사하겠습니다.

https://cilium.isovalent.com/hubfs/Learning-eBPF%20-%20Full%20book.pdf
1. compile with clang
hello.bpf.o: %.o: %.c
clang \
-target bpf \
-I/usr/include/$(shell uname -m)-linux-gnu \
-g \
-O2 -c $< -o $@
line1: .o파일을 .c파일로부터 만듦(% : 와일드 카드)
line2: LLVM 컴파일러인 Clang을 사용하여 소스 코드를 컴파일
line3: Clang이 BPF 목표 아키텍처를 컴파일하도록 지정하는 옵션
line4: 헤더 파일을 조회할 디렉터리 지정
line5: 디버그 정보를 포함하여 컴파일
line6: O2 - 최적화 레벨, $< - 현재 목표의 종속 항목 중 첫번째 (해당 코드에서는 .c파일) , $@ - 현재 목표 (해당 코드에서는 .c파일) => .c를 compile하여 .o파일로 생성
https://hyeonbell.tistory.com/174
2. llvm-objdump -S hello.bpf.o
- eBPF IR파악을 위한 dump
https://github.com/chubin/cheat.sheets/blob/master/sheets/objdump
result
hello.bpf.o: file format elf64-bpf
Disassembly of section xdp:
0000000000000000 <hello>:
; bpf_printk("Hello World %d", counter);
0: 18 06 00 00 00 00 00 00 00 00 00 00 00 00 00 00 r6 = 0 ll
2: 61 63 00 00 00 00 00 00 r3 = *(u32 *)(r6 + 0)
3: 18 01 00 00 00 00 00 00 00 00 00 00 00 00 00 00 r1 = 0 ll
5: b7 02 00 00 0f 00 00 00 r2 = 15
6: 85 00 00 00 06 00 00 00 call 6
; counter++;
7: 61 61 00 00 00 00 00 00 r1 = *(u32 *)(r6 + 0)
8: 07 01 00 00 01 00 00 00 r1 += 1
9: 63 16 00 00 00 00 00 00 *(u32 *)(r6 + 0) = r1
; return XDP_PASS;
10: b7 00 00 00 02 00 00 00 r0 = 2
11: 95 00 00 00 00 00 00 00 exitIR opcode에 대한 reference
https://github.com/iovisor/bpf-docs/blob/master/eBPF.md
3. load program with "bpftool" (require root previlige)
sudo bpftool prog load hello.bpf.o /sys/fs/bpf/hello
how to check
ls /sys/fs/bpf
4. list bpf programs
sudo bpftool prog list
get output with prettified JSON
sudo bpftool prog show id 101 --prettyoutput
{
"id": 101,
"type": "xdp",
"name": "hello",
"tag": "d35b94b4c0c10efb",
"gpl_compatible": true,
"loaded_at": 1706073152,
"uid": 0,
"bytes_xlated": 96,
"jited": true,
"bytes_jited": 64,
"bytes_memlock": 4096,
"map_ids": [4,5
],
"btf_id": 159
}-program ID: 101
-xdp event를 통한 attach
-program name: hello
-identifier
-GPL compatible license
-program이 로딩된 시점의 timestamp - 부팅이후의 시점부터
-userID 0 (root) 로 load
-eBPF bytecode로 변환된 프로그램의 크기
-JIT compiled 및 컴파일 이후 machine code의 크기
-BPF map ID들
- -g flag로 컴파일 했을시 포함되는 정보이며, 해당 BTF id 는 단일 블록의 BTF 정보를 포함
program ID는 load와 unload를 할때마다 바뀌지만 tag는 유지된다 -> tag가 고유한 것은 아니다.
같은 name으로 program을 생성할 수 있으며 여러 인스턴스를 가질 수 있지만, ID와 pinned path는 고유하다.
그리고 아래의 instruction들을 통해 bpf program의 정보를 파악할 수 있다. (네가지 모두 동일한 output)
• bpftool prog show id 540
• bpftool prog show name hello
• bpftool prog show tag d35b94b4c0c10efb
• bpftool prog show pinned /sys/fs/bpf/hello
Translated Byte code확인
sudo bpftool prog dump xlated name hellooutput
int hello(struct xdp_md * ctx):
; bpf_printk("Hello World %d", counter);
0: (18) r6 = map[id:4][0]+0
2: (61) r3 = *(u32 *)(r6 +0)
3: (18) r1 = map[id:5][0]+0
5: (b7) r2 = 15
6: (85) call bpf_trace_printk#-66752
; counter++;
7: (61) r1 = *(u32 *)(r6 +0)
8: (07) r1 += 1
9: (63) *(u32 *)(r6 +0) = r1
; return XDP_PASS;
10: (b7) r0 = 2
11: (95) exit상기의 output은 verifier를 통과한 이후의 bytecode이다.
해당 bytecode는 저수준언어와 유사하게 생겼지만 machine code 급은 아니다(?) 그 사이 어딘가 애매한 상태이다.
eBPF는 JIT compiler를 통해 eBPF bytecode를 machine code로 변환한다.
-> 퍼포먼스를 위해서!
JITed code를 assembly어의 형태로!
sudo bpftool prog dump jited name hellooutput
int hello(struct xdp_md * ctx):
bpf_prog_d35b94b4c0c10efb_hello:
; bpf_printk("Hello World %d", counter);
0: nopl (%rax,%rax)
5: nop
7: pushq %rbp
8: movq %rsp, %rbp
b: pushq %rbx
c: movabsq $-99790339293184, %rbx
16: movl (%rbx), %edx
19: movabsq $-124354625743600, %rdi
23: movl $15, %esi
28: callq 0xffffffffce103260
; counter++;
2d: movl (%rbx), %edi
30: addq $1, %rdi
34: movl %edi, (%rbx)
; return XDP_PASS;
37: movl $2, %eax
3c: popq %rbx
3d: leave
3e: retq
3f: int3
ps. JIT compilation을 활용하기 위해서는 CONFIG_BPF_JIT옵션이 켜져있는 kernel이어야 한다.
상기의 IR은 내가 보던 pdf와 달랐는데, 느낌상으로는 내 pc와 예제의 환경이 상이하여 발생한 차이인듯하다.
이제 program이 load된 것을 보았으니 event와 attach하고 trigger해보자.
attach할 때, 유의할 부분이 type이다.
위에서 우린 xdp event에 attach하겠다고 하였으므로 bpftool을 사용하여 eBPF 프로그램에 xdp event를 attach해보자.
sudo bpftool net attach xdp id 101 dev enp5s0뒷쪽의 id와 device는 적절하게 맞추어 주자!
현재 본인의 경우..

ifconfig로 확인하자~
cf. lo는 loopback interface이다. 해당 interface는 traffic을 내 machine에 보내기 위해 사용
enp5s0
-ref-
https://blog.naver.com/snrndi121/220999725150
이후에 network interface가 추가된 것을 볼 수 있다.
sudo bpftool net listoutput( enp5s0 interface가 attach된 상태)
xdp:
enp5s0(2) generic id 101

tc:

flow_dissector:

netfilter:
ip link명령어로도 확인가능

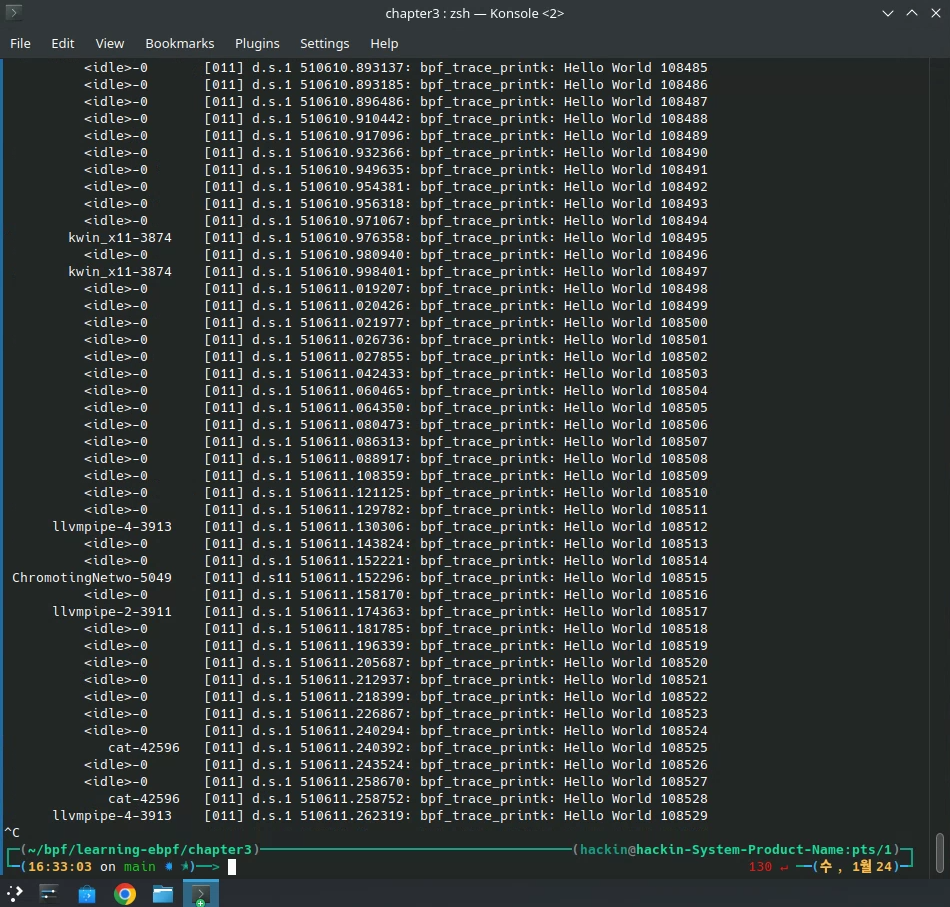
현 상태에서는 network packet 수신에 대해 output을 매번 trace utput으로 저장해야 되며 아래의 명령을 통해 확인가능하다.
cat /sys/kernel/debug/tracing/trace_pipe요로코롬
아래의 명령어로도 tracelog를 확인할 수 있다.
sudo bpftool prog tracelogkernel에 load된 map들을 보고싶다면!
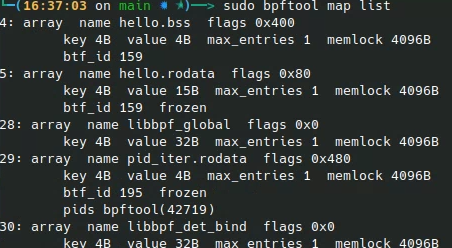
그리고 생성된 program에 대해 section도 관찰할 수 있다.
sudo bpftool map dump name hello.bssoutput(.bss section(초기화되지 않은 전역변수)의 전역변수를 볼 수 있다.)
[{
"value": {
".bss": [{
"counter": 124555
}
]
}
}
].rodata section
sudo bpftool map dump name hello.rodataoutput
[{
"value": {
".rodata": [{
"hello.____fmt": "Hello World %d"
}
]
}
}
]
attach했던 program을 해제하고 싶다면!
sudo bpftool net detach xdp dev enp5s0이후에 net list를 입력해보면 비어있는 것을 확인할 수 있다.
다음으로 unload하고 싶다면!
sudo rm /sys/fs/bpf/hello
sudo bpftool prog show name hello
output이 아무것도 없다면 된다. 더이상 load된 program이 없기 때문~
마저 진행해보자!
tail call에 대해서부터 시작이다.
간단한 예제코드를 먼저 보자.
#include <linux/bpf.h>
#include <bpf_helpers.h>
static __attribute((noinline)) int get_opcode(struct bpf_raw_tracepoint_args *ctx) {
return ctx->args[1];
}
SEC("raw_tp/")
int hello(struct bpf_raw_tracepoint_args *ctx) {
int opcode = get_opcode(ctx);
bpf_printk("Syscall: %d", opcode);
return 0;
}
char LICENSE[] SEC("license") = "Dual BSD/GPL";- opcode를 추출하는 간단한 함수인데 compiler에서 저 함수만을 지속적으로 처리할 경우, 인라인 처리 하는 것을 방지하기 위해 noinline 속성으로 정의한다.
- opcode를 추출하여 printk로 출력
이제 이전 글에서 수행했던 것 처럼 파일을 load해보자.
sudo bpftool prog load hello-func.bpf.o /sys/fs/bpf/hello
sudo bpftool prog list name hello
output
166: raw_tracepoint name hello tag 3d9eb0c23d4ab186 gpl
loaded_at 2024-01-25T08:36:33+0900 uid 0
xlated 80B jited 62B memlock 4096B map_ids 37
btf_id 207
이제 get_opcode() 함수를 보기 위해 eBPF 바이트코드 살펴보자.
sudo bpftool prog dump xlated name hellooutput
int hello(struct bpf_raw_tracepoint_args * ctx):
; int opcode = get_opcode(ctx);
0: (85) call pc+7#bpf_prog_cbacc90865b1b9a5_get_opcode
; bpf_printk("Syscall: %d", opcode);
1: (18) r1 = map[id:37][0]+0
3: (b7) r2 = 12
4: (bf) r3 = r0
5: (85) call bpf_trace_printk#-66752
; return 0;
6: (b7) r0 = 0
7: (95) exit
int get_opcode(struct bpf_raw_tracepoint_args * ctx):
; return ctx->args[1];
8: (79) r0 = *(u64 *)(r1 +8)
; return ctx->args[1];
9: (95) exit- hello()이 get_opcode()를 호출하며 eBPF IR기준으로 offset 0은 0x85이며 이는 "Function call"을 의미한다.
이후에, offset 1에 있는 다음 명령어를 실행하는 대신, 7개의 IR을 건너뛰어(pc+7에 의해) offset 8을 향하게 된다.
- 해당 위치에 get_opcode()이 존재한다.
하지만 위와 같은 tail call은 stack size가 512byte로 제한적인 eBPF 에서는 많이 활용되기 어렵다.
이상으로 chapter3의 내용을 마친다.
'ebpf' 카테고리의 다른 글
| CO-RE, BTF, and Libbpf (0) | 2024.02.11 |
|---|---|
| The bpf() System Call (0) | 2024.01.25 |
| eBPF programming (0) | 2024.01.09 |
| Troubleshooting - learning eBPF (0) | 2024.01.01 |
| JIT for BPF (0) | 2023.09.21 |